Let’s be honest, packing up your kitchen is one of those moving tasks that makes your stomach drop. You look at all your dishes, glasses, and that coffee mug your sister gave you for your birthday, and all you can think about is how easily it could all end up as expensive confetti in a cardboard box.
But here’s what we’ve learned from countless moves (and plenty of friends who’ve been there): taking a little extra time with the right packing approach really does make a huge difference. I used to be the person who’d just wrap everything in whatever towels I had lying around and cross my fingers. Then I watched my favorite mixing bowls turn into ceramic shards, and I decided there had to be a better way.
Turns out there is. With some proper packing materials and a bit of strategy, you can actually get your kitchen stuff from point A to point B in one piece. It’s not rocket science, just a few extra steps that can save you from the heartbreak of unpacking broken treasures and having to replace half your kitchen.
Table of Contents
Quick Summary
| Key Point | Explanation |
| 1. Gather Quality Packing Materials | Use sturdy boxes, bubble wrap, and tape to protect kitchenware during transit. Prefer heavy-duty materials for maximum safety. |
| 2. Sort and Organize Effectively | Clear workspace, categorize items by frequency and use, and group fragile pieces for efficient packing. |
| 3. Wrap Items Carefully | Employ multiple protective layers, wrapping each item securely, especially delicate ones, to prevent damage. |
| 4. Pack Boxes Strategically | Reinforce boxes, distribute weight evenly, and indicate fragile items to enhance protection and simplify unpacking. |
| 5. Label Clearly for Easy Identification | Use distinct labels that include room destination, contents, and identifiers for fragile items to streamline the moving process. |
Step 1: Gather Packing Materials and Supplies
Packing kitchenware requires strategic preparation and the right collection of materials to ensure your delicate dishes, glassware, and cooking tools arrive safely at their destination. Before you start wrapping and boxing your kitchen items, assembling a comprehensive packing kit will save you time, reduce stress, and minimize potential breakage during storage or moving.
Your primary goal in this initial stage is to gather high-quality packing supplies that provide maximum protection for your kitchenware. According to Yale University, using heavy-duty corrugated containers and proper sealing techniques is crucial for protecting your items.
Start by collecting essential packing materials that will become your kitchenware protection arsenal. You will need sturdy corrugated cardboard boxes in various sizes, preferably with double wall construction for added strength. Medium sized boxes work best for dishes and smaller kitchen items, while larger boxes can accommodate bulkier cookware. Obtain specialized dish pack boxes if possible, which have reinforced walls designed specifically for fragile kitchen items.
Next, gather cushioning materials that will prevent items from shifting and potentially breaking during transit. Your protection toolkit should include:
-
Bubble wrap (multiple sizes)
-
Packing paper
-
Foam sheets
-
Packing tape
-
Permanent markers for labeling
-
Scissors
-
Soft packing cloths or towels
Prioritize quality packing tape that securely seals boxes without easily tearing. Professional movers recommend using packaging tape that is at least 2 inches wide and has strong adhesive properties. Avoid using household masking tape or thin scotch tape, which will not provide sufficient box closure.
As you collect your materials, create a dedicated staging area where you can organize your supplies systematically. This approach prevents last minute scrambling and helps you maintain an efficient packing workflow. By investing time in gathering the right materials upfront, you significantly reduce the risk of damage to your cherished kitchenware during the moving or storage process.
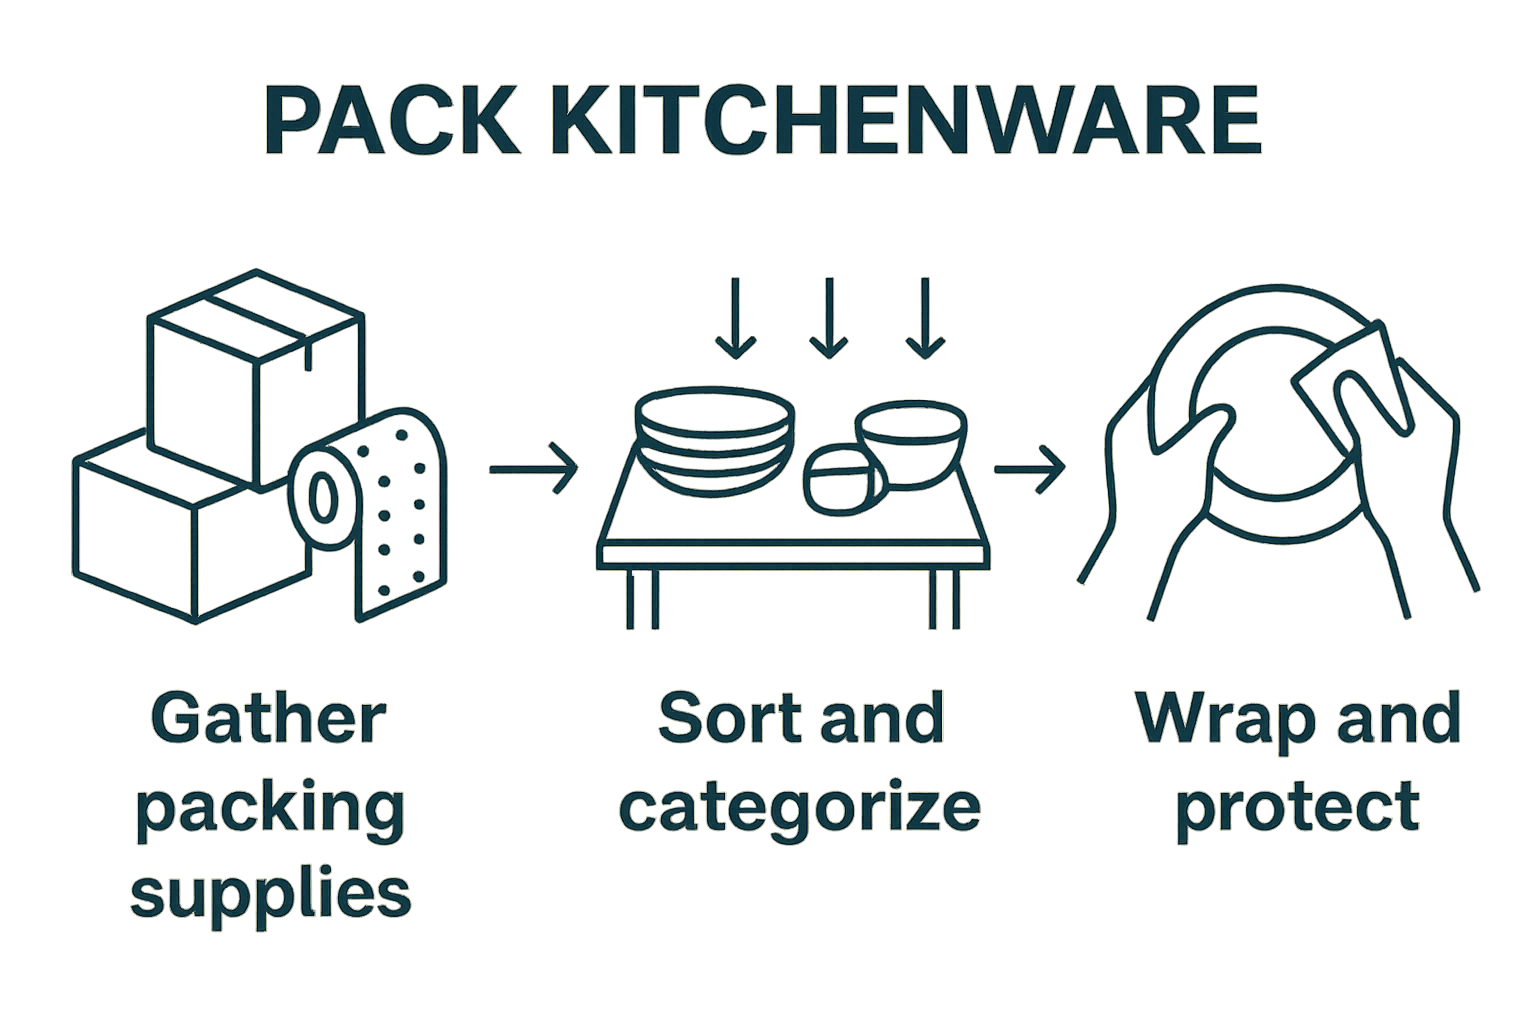
Step 2: Sort and Categorize Kitchenware Items
Sorting and categorizing your kitchenware is a critical step that transforms a potentially chaotic packing experience into a streamlined process. By methodically organizing your kitchen items, you create a strategic plan that protects your belongings and simplifies both storage and moving efforts. According to Iowa State University Extension and Outreach, categorizing kitchen items helps enhance overall efficiency and decision making.
Begin your sorting process by clearing a large, clean workspace where you can spread out all your kitchenware. This might be your kitchen counter, dining table, or a dedicated staging area. Empty every cabinet, drawer, and shelf, placing items in a way that allows you to see everything at once. This comprehensive view helps you make informed decisions about what to keep, pack, store, or potentially donate.
Create distinct categorization zones to organize your kitchenware effectively. Your primary categories should include:
-
Everyday dishes and utensils
-
Delicate glassware and china
-
Specialty cooking tools
-
Seasonal or rarely used items
-
Damaged or duplicate items
As you sort, evaluate each item’s condition, frequency of use, and sentimental value. Prioritize items that are functional, in good condition, and genuinely useful. For specialty or seasonal items like holiday serving platters or rarely used small appliances, consider whether they truly merit the space and effort of packing and moving.
Pay special attention to fragile items like crystal stemware, ceramic bowls, and delicate serving pieces. These require extra care and should be sorted with potential packaging methods in mind. Group similar fragile items together so you can plan appropriate wrapping and cushioning techniques when you begin the actual packing process.
Once you have completed your sorting, take a moment to inventory your kitchenware. Creating a quick list or taking photographs can help you track your items and ensure nothing gets lost during moving or storage. This step also provides an opportunity to identify any items you might want to replace or upgrade in the future.
Your sorting is complete when you have distinct, organized piles of kitchenware ready for the next phase of packing. By investing time in this meticulous categorization, you set yourself up for a smoother, more efficient packing experience that minimizes stress and potential breakage.
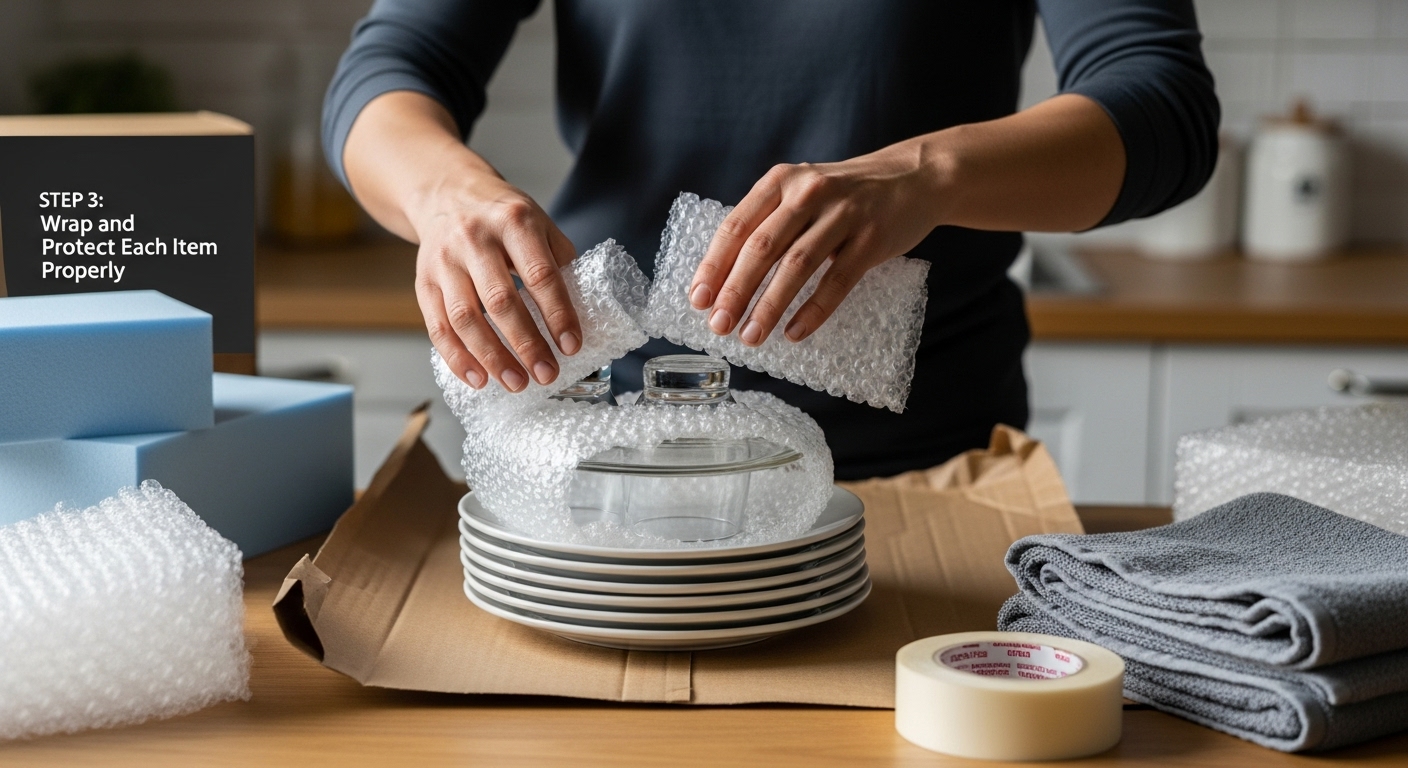
Step 3: Wrap and Protect Each Item Properly
Wrapping and protecting kitchenware requires precision, patience, and a methodical approach that transforms fragile items into well-cushioned travelers ready to survive transport. According to Yale University’s packing instructions, proper wrapping techniques are crucial in preventing damage during relocation.
Begin by creating a clean, flat workspace where you can spread out your wrapping materials. Arrange bubble wrap, packing paper, foam sheets, and soft cloths within easy reach. The key is to create multiple protective layers that absorb shock and prevent items from touching each other directly.
For delicate glassware and china, start with a base layer of soft packing paper. Gently wrap each piece individually, using circular wrapping motions that cover the entire surface without creating harsh creases. Pay extra attention to handles, stems, and protruding edges which are most vulnerable to damage. Wrap each item completely, ensuring no part of the surface remains exposed.
Heavier ceramic dishes and cookware require slightly different techniques. Use bubble wrap with the bubbles facing inward toward the item, creating a cushioning effect that distributes potential impact. Secure each wrapped item with painter’s tape, which removes cleanly and won’t leave residue on your kitchenware.
Your strategic wrapping toolkit should include:
-
Multiple sizes of bubble wrap
-
Soft packing paper
-
Foam sheets
-
Painter’s tape
-
Clean packing cloths or towels
For nested items like mixing bowls or measuring cups, insert crumpled packing paper between each piece to prevent direct contact. This technique prevents scratching and provides additional shock absorption during moving or storage.
Specialty items like sharp kitchen knives demand extra caution. Wrap knife blades individually in thick cardboard or bubble wrap, ensuring the sharp edge is completely covered. Bundle knives together using soft cloth, keeping blades pointed in the same direction to prevent accidental punctures.
Verify your wrapping by gently shaking each wrapped item. If you hear no shifting or detect no movement inside the wrapping, you have successfully protected that piece. A well-wrapped item should feel snug but not compressed, with consistent padding around all surfaces.
By investing time in meticulous wrapping, you transform vulnerable kitchenware into resilient packages ready to withstand the challenges of moving and storage. Your careful attention now prevents heartbreak later when unpacking your treasured kitchen items.
Step 4: Pack Kitchenware into Boxes Strategically
Packing kitchenware into boxes is more than simply filling containers it requires thoughtful strategy and precision to ensure your items arrive safely at their destination. According to The University of California, Berkeley, creating a systematic approach helps prevent damage and makes unpacking more manageable.
Start by reinforcing your boxes with sturdy packing tape. Apply multiple strips along the bottom seam, creating a strong foundation that will support the weight of your kitchenware. Create a soft base layer inside each box using crumpled packing paper or bubble wrap, which will provide initial cushioning for your wrapped items.
Begin packing with heavier, sturdier items like cast iron skillets, ceramic baking dishes, and thick serving platters. Place these at the bottom of the box, creating a stable base. Surround these items with additional padding to prevent movement. As you build upward, gradually add lighter and more delicate items like glasses, china, and smaller cooking tools.
Your strategic packing approach should follow these key principles:
-
Create distinct weight zones within each box
-
Use vertical stacking to maximize space
-
Fill empty spaces with additional padding
-
Prevent items from touching directly
-
Distribute weight evenly
For fragile stemware and delicate glasses, create individual columns using specialized dividers or custom padding. Stand these items vertically rather than stacking them horizontally, which reduces pressure and potential breakage. Wrap each piece completely and fill any internal spaces with crumpled tissue paper to prevent shifting.
Pay close attention to box weight limits. Professional movers recommend keeping each box under 50 pounds to ensure safe lifting and handling. As you pack, periodically lift and assess the box’s weight. If it feels uncomfortably heavy, redistribute items or start a new container.
Label each box clearly with its contents and destination room. Use a permanent marker to note fragile items and indicate which side should remain upright. This extra step helps movers and yourself handle boxes with appropriate care.
Verify your packing by gently shaking each box. If you hear no internal movement and the items feel secure, you have successfully packed that container. A well-packed box should feel solid, with no internal shifting or loose items.
Your careful approach transforms potential chaos into a methodical, protective packing system that safeguards your cherished kitchenware.
Step 5: Label Boxes Clearly for Easy Identification
Labeling boxes is the critical communication system that transforms a chaotic moving process into an organized, efficient transition. According to The University of Michigan, clear labeling ensures items are easily identifiable and placed correctly at their destination.
Develop a comprehensive labeling strategy that goes beyond simply writing the room name. Your labeling system should communicate essential information at a glance, providing movers and yourself with critical details about the box’s contents, fragility, and handling requirements.
Start by selecting a high-contrast permanent marker that writes clearly on various box surfaces. Black or dark blue markers work best, offering maximum readability. Begin each label with the destination room, then add specific details about the contents. For kitchenware, include subcategories like “Fragile Glassware” or “Heavy Ceramic Dishes” to provide immediate context.
Your labeling toolkit should include:
-
Permanent markers
-
Color-coded sticker labels
-
Packing tape
-
Clipboard for inventory tracking
-
Label protector sheets (optional)
Create a consistent labeling format that becomes your personal moving code. For each box, write information on at least two sides to ensure visibility when boxes are stacked or moved. Include additional critical details such as:
-
Destination room
-
Contents description
-
Fragility indicator
-
Box number in sequence
-
Your name or contact information
For kitchenware boxes, use special marking techniques to highlight delicate items. Use bright red or orange stickers marked “FRAGILE” on boxes containing breakable items like wine glasses or fine china. Draw arrows indicating which side should remain upright, preventing potential mishandling during transport.
Consider creating a digital inventory alongside your physical labels. Take photographs of box contents and create a spreadsheet tracking each box’s number, contents, and destination. This backup system provides an extra layer of organization and helps quickly locate specific items during unpacking.
Verify your labeling by stepping back and reviewing the boxes from a mover’s perspective. Each box should tell a clear story about its contents, handling requirements, and final destination. A well-labeled box communicates everything needed without requiring additional explanation, transforming your kitchenware packing from a potential logistical nightmare into a smooth, manageable process.
Step 6: Verify Content and Check for Damage Before Moving
Verifying your kitchenware’s condition before moving represents the critical final checkpoint in your packing process. According to The University of Kentucky’s Facilities Management, careful pre-move inspection can prevent potential loss and damage during transportation.
Create a systematic inventory process that transforms your careful packing into a comprehensive documentation strategy. Begin by clearing a large, clean surface where you can methodically unpack and inspect each wrapped item. Natural light helps reveal subtle cracks or existing damage that might have been overlooked during initial sorting and packing.
Start with your most delicate and valuable kitchenware. Carefully unwrap each item, examining it against your pre-packing mental or written inventory. Look for potential stress points like hairline cracks in ceramic dishes, chips along glass rims, or weakened handles on cookware. Document any pre-existing damage with clear photographs, which can be crucial for insurance purposes if additional damage occurs during moving.
Your verification toolkit should include:
-
Bright flashlight
-
Magnifying glass
-
Clean white cloth
-
Camera or smartphone
-
Notebook for documentation
-
Soft white gloves (optional)
Pay special attention to specialty and irreplaceable items. Vintage china, inherited cookware, or expensive kitchen equipment deserve extra scrutiny. Gently rotate each piece, examining it from multiple angles. Use a clean white cloth as a background to highlight any imperfections that might blend into patterned surfaces.
For fragile items like wine glasses and delicate porcelain, hold each piece up to a light source. This technique reveals potential stress lines or microscopic cracks that might not be immediately visible. Tap delicate ceramic pieces gently, listening for any unusual sounds that might indicate internal fractures.
Create a comprehensive damage report that includes photographs, written descriptions, and estimated replacement values. This documentation serves multiple purposes: it provides a clear record for moving insurance, helps track your kitchenware’s condition, and gives you peace of mind about your items’ safety.
Verify your inspection by confirming you have:
-
Photographed each item
-
Noted any existing damage
-
Carefully rewrapped items
-
Returned items to their labeled boxes
-
Created a digital and physical inventory
A thorough verification process transforms potential moving anxiety into confident preparation, ensuring your kitchenware arrives at its destination in the same condition it left.
Here is a checklist table summarizing the verification steps to ensure your kitchenware is safely packed before moving.
| Step | Action Required | Purpose/Outcome |
| 1 | Unwrap and inspect each item | Detect cracks, chips, or pre-existing damage |
| 2 | Compare items to inventory list or photos | Confirm all items are accounted for before moving |
| 3 | Document existing damage with photos and notes | Provide proof for insurance and peace of mind |
| 4 | Wrap items carefully after inspection | Maintain protection until final destination |
| 5 | Place items back in labeled boxes | Ensure correct box contents align with inventory |
| 6 | Create or update digital/physical checklist | Track the condition and location of all items |
| 7 | Verify each box is securely closed and labeled | Prevent accidental loss or mishandling during the move |
Take the Stress Out of Packing and Moving Your Kitchenware
Worried about accidental cracks or broken dishes while packing your kitchenware for storage or a move? We understand the frustration of spending hours wrapping fragile items, only to cross your fingers and hope they arrive in one piece. Your time and valuables deserve better protection and you want the confidence that comes from expert solutions. After following every wrapping tip and labeling trick, you still face the challenge of storing or moving everything safely and on your schedule.

Let Stomo’s portable storage and moving services give you the peace of mind you crave. We deliver weatherproof containers directly to your door throughout South Carolina, so you can pack your boxed kitchenware at your own pace with zero rush or hassle. Ready for a move? Our concierge-style moving service offers flat-rate pricing with no surprises, handling the heavy work for you—including gentle loading, careful delivery, and even wall-hanging help. Don’t risk hidden damage by leaving your valuables with national chains or in unreliable hands. Visit Stomo Storage now to secure your kitchenware’s safety. Experience stress-free storage and moving backed by local expertise and award-winning service.
Frequently Asked Questions
How should I prepare my kitchenware for moving?
To prepare your kitchenware for moving, gather high-quality packing materials such as sturdy boxes, bubble wrap, packing paper, foam sheets, and packing tape. Sort your items by category, wrap them individually, and pack them strategically into boxes, ensuring that heavier items are at the bottom and delicate items are cushioned properly.
What materials are essential for packing kitchenware?
Essential materials for packing kitchenware include heavy-duty corrugated boxes, bubble wrap, packing paper, foam sheets, packing tape, and markers for labeling. These supplies help ensure that your kitchenware is well-protected during transport.
How can I wrap fragile kitchen items properly?
When wrapping fragile kitchen items, start with a base layer of soft packing paper, wrapping each piece individually in circular motions to avoid creases. For delicate glassware, use bubble wrap with the bubbles facing inwards and secure with painter’s tape. Ensure each item is completely covered and use extra cushioning between nested items.
What should I label my packed kitchenware boxes?
Label your packed kitchenware boxes with the destination room, a brief description of the contents, and clearly mark items as fragile. Consider using color-coded stickers for fragile items and note which side should remain upright to facilitate careful handling during the move.